Olympus OM 35mm film system close-up and macro equipment
Double Cable Release
Introduction
The Double Cable Release is intended for use with the Auto Bellows, and allows the auto diaphragm of a Zuiko lens to be closed just before the shutter is released.
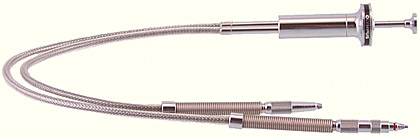
Olympus OM Double Cable Release
The shorter of the 2 cables is attached to the camera. The longer cable, which has a red ring near its tip, is attached to the lens mount of the Auto Bellows; the socket is on the same side as the smaller knob.
The length of the needle in the longer cable must be adjusted so that the shutter is tripped just after the diaphragm is fully closed. This adjustment only needs to be done once, and has to be done when there is not a film in the camera. There are instructions in the manual for the Bellows.
The double cable release provides automatic diaphragm operation with the 4 auto bellows macro lenses, the 3 ordinary auto macro lenses, and with non-macro lenses.
| US stock no. | 104-110 |
|---|---|
| Introduced | 1972 |
| Discontinued | 2002 |
| 1978 US price | $16.00 |
| 1988 US price | $32.00 |
The Double Cable Release was also part of the PMT-35 Manual Photomacrographic System. It could be used with the PM-BD35A Auto Bellows to close the iris diaphragm in auto bellows macro lenses just before firing the shutter in the camera body. It could also be used in conjunction with the Mechanical Shutter PM-MS35, a leaf shutter that fits just behind the front lens standard of the PM-BD35A Auto Bellows and was used to minimise vibration at high magnifications (see the instructions below).
Manual for Macrophotography Group
Extract reproduced with permission from the copyright owner, Olympus Optical Co., Ltd
Printed 0777
ADJUSTING THE DOUBLE CABLE RELEASE (prior to film loading)
• The two needles at the ends of the double cable release must be adjusted before loading film in the camera.
When using standard lenses or the Zuiko Macro Lens 50 mm F3.5 with the Auto Bellows, you can retain automatic stop-down exposure operation by using the double cable release. To ensure proper operation, the double cable release must be adjusted to synchronize the actions of the lens diaphragm and camera shutter at the moment of exposure.
In auto bellows operation, the diaphragm blades must close to the pre-selected aperture at the moment the shutter release is triggered. To assure this synchronization, the longer needle length must be adjusted by turning the knurled ring. The longer needle (upper in photo, left) is connected to the lens mount board and the shorter needle (lower) is threaded into the shutter release button on the camera.
Use the following procedure to test the synchronization of the cable release and repeat it until proper operation is assured. (Ascertain that the selector lever of the OM-2 is set at the “MANUAL” position prior to steps below.)
- Set the camera shutter speed ring to the “B” (bulb) position.
- Set the lens aperture ring to the minimum aperture.
- Open the camera back.
- Release the shutter slowly by pressing the plunger on the double cable release.
- Look through the back of the camera. As the shutter opens, the diaphragm blades should close to the preselected aperture.
- Apply additional pressure to the plunger. If the diaphragm blades continue to close, make the needle in the lens mount board longer. Re-test until no further movement of the blades can be seen when the plunger is fully depressed.
• Timer Screw
To take time exposures (over 1 second), first rotate the timer screw counter-clockwise and press the double cable release plunger. Tighten the screw until the plunger remains depressed even after your finger is removed. When the exposure has been completed, loosen the timer screw. The plunger will then return to its original position.
OLYMPUS
OLYMPUS OPTICAL CO., LTD.
43-2 Hatagaya 2-chome, Shibuya-ku, Tokyo, Japan
Synchronization of the mechanical shutter and camera shutter
The double cable release must be adjusted so that the mechanical shutter will be open after the camera shutter opened:
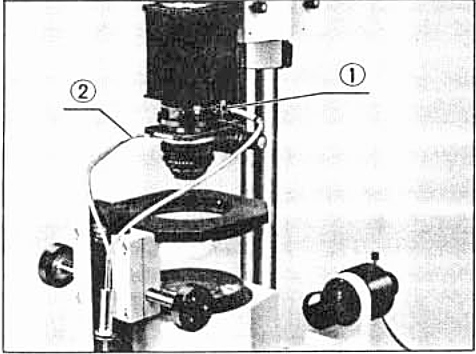
Olympus OM Double Cable Release with mechanical shutter
- Make this adjustment before film loading.
- Screw the shorter cable needle into the mechanical shutter (1), and the longer cable needle (2) into the socket of the bellows.
- Loosen the lock nut so that you can rotate the knurled adjustment sleeve.
- Charge both shutters.
- Rotate the knurled adjustment sleeve either direction until the camera shutter can be opened before the mechanical shutter is released. The shutter should be released without too much pressure on the plunger.
* Start this adjustment with the minimum length of the cable needle. - For actually taking a picture, the camera shutter will be set at position B.
Send comments or questions to Alan Wood
![]()
Created 18th May 2001 — Updated 15th August 2005
Copyright © 2001–2005 Alan Wood